MuseGen MuseGen Team
9/18/2026
An AI music video is not one generation. It is a chain: a finished song goes in, the track is analysed, a storyboard is written from what the analysis found, individual shots are rendered one at a time, and the shots are merged back against the audio. Four named stages, and you only ever touch the first one. That shape matters, because the decisions that determine whether the result is usable are not made at the end. They are made before the first shot renders, when you pick an aspect ratio and a resolution — and those two settings quietly decide which platforms will accept the file you end up with. This page walks the chain in order, names what each stage actually reads, and finishes at the upload form, where there is one more thing you are expected to do.
What this walkthrough covers #
The four stages in the order they run, the settings that have to be right before you start, and the two platform requirements that sit between a finished MP4 and a published video. Every specification below comes from the tool's own interface or from YouTube's and Spotify's published help pages.
- The container is decided before the render, not after it. Aspect ratio, resolution and length are chosen up front, and they are what decides which platforms will accept the file. Changing your mind afterwards means rendering again and paying again.
- The song has to exist before the video does. The pipeline reads a finished track and builds the visual plan from what it finds in the audio: key, mood, genre and a short list of emotional keywords. There is nothing to storyboard until there is a song.
- Lyrics become subtitles, not narration. The lyrics attached to the track are used for on-screen subtitles timed against the vocal. An instrumental track is detected as one and renders with no subtitles at all.
- Publishing has a step that rendering does not. YouTube lists AI generated music among the examples creators are asked to disclose, and Spotify has both a resolution floor and a publishing-rights process that sit between a finished file and a live video.
Quick facts #
- What it is — A video rendered from a finished audio track, not a clip generated from a text prompt.
- The chain — Audio analysis, storyboard, shot-by-shot rendering, merge. Four stages, run in that order.
- Shape — 16:9 landscape or 9:16 vertical, chosen before the render starts.
- Resolution — Two steps in MuseGen's MV flow, labelled Standard and HD, carrying 480P and 768P underneath. Neither reaches 1080p, which is 1920×1080.
- Source track — Under 5 minutes, with a short minimum length the upload form states when a clip falls under it. MP3, WAV or M4A up to 30MB if you supply the file.
- Subtitles — Taken from the track's lyrics and timed to the vocal. Instrumental tracks render without them.
- Output — An MP4, plus a downloadable cover image.
- Checked — 16 September 2026, from the MuseGen MV page and the YouTube and Spotify for Artists help centres.
Four stages, not one button #
The phrase "AI music video generator" suggests a box you type into. It is worth being clear early that this is a different kind of tool from a text-to-video clip generator, because almost everything that follows is a consequence of the difference.
A clip generator takes a description and returns a few seconds of footage. A music video generator takes a song and returns a timeline. In MuseGen's MV flow the work is broken into four labelled stages, and the progress panel names each one as it runs:
- Audio Analysis Import — described in the interface as detecting data, style and rhythm. This is the stage that turns your audio into something a visual plan can be written from.
- Writing storyboard — creating a shot-by-shot visual plan. Nothing has been drawn yet; this is the script.
- Rendering shots — generating visual frames with AI. The progress line counts through them one at a time.
- Merging & finalizing — assembling the final music video, which is where the picture is laid against the audio and the subtitles are burned in.
The interface summarises the same thing in three user-facing steps: import the audio, at which point lyrics and genre are analysed automatically; choose aspect ratio, resolution and art style; render the video with synced lyric subtitles. Those three steps are what you do. The four stages above are what happens.
The chain, with the one thing that is not in it: a place to edit the storyboard. The visual plan is written from the analysis and rendered without a review step, which is why the settings that precede stage one carry so much weight.
Notice what is missing from that list. There is no stage at which the storyboard is handed back to you for approval, and no shot list you can reorder before the render starts. The plan is written and executed in one pass. Your leverage over the result is therefore entirely upstream: the song you feed it, the style you constrain it with, and the container you ask for. Once the render begins, the next decision available to you is whether to run it again.
It is also worth knowing what the rest of the field does here, because it is not much. Suno's help centre, which runs to seven categories and dozens of articles about making music, contains no documentation of any video feature at all. Udio does render video, but its own note on the Universal Music Group partnership states that down of audio, video and stems has been disabled, so a video made there stays there. For most people, "make an AI music video" currently means generating the song in one place and rendering the video somewhere that will hand you the file.
If you would rather watch the whole job done once before reading about it, there is a substantial third-party walkthrough of the same task. It is an independent creator's guide rather than any vendor's, and it is worth treating the specific tools in it as a snapshot: this is the fastest-moving corner of the field, and a guide filmed in July 2026 is describing July 2026's options. Watch on YouTube: How to Make a Professional Music Video with AI (Full Guide) — a nineteen-minute independent walkthrough on the Tao Prompts channel, published 6 July 2026.
Decide the container first #
This is the section that will save you the most money, so it comes before the parts that are more fun.
An MV render is not a master you crop later. The aspect ratio determines what each shot is composed for; the resolution determines the pixel dimensions of the finished file; and both are chosen in the form before the render starts. In MuseGen's MV flow the aspect choice is 16:9 or 9:16, with 16:9 selected by default, and the resolution choice is two steps labelled Standard and HD — 480P and 768P underneath those labels — with Standard selected by default. Neither can be changed after the fact without rendering again.
What makes that consequential is that the destinations do not agree with each other. Here is what the platforms themselves ask for:
| Destination | Shape | Length | Size requirement |
|---|---|---|---|
| YouTube, standard video | 16:9 is the standard aspect ratio on a computer | No limit relevant to a song | 1080p encodes to 1920×1080; 720p to 1280×720; 480p to 854×480 |
| YouTube Shorts | Vertical | Up to 3 minutes | Uploads supported to a maximum resolution of 1080p |
| Spotify, direct video upload | Landscape 16:9 | Longer than 30 seconds, shorter than 20 minutes | At least 1920×1080, under 50 GB |
| Spotify Canvas | Vertical 9:16 | 3 to 8 seconds | Between 720 and 1080 pixels tall, MP4 or JPG |
Read the Spotify direct-upload row carefully, because it is the one that catches people. Spotify's direct video upload asks for at least 1920 by 1080 pixels. The taller of the two steps in this flow is 768 pixels. If a Spotify video is the destination, an MV rendered at the resolutions available in this flow is not the deliverable — it is a rough cut, a social asset, or a YouTube upload, and it is better to know that before you spend the render than after.
YouTube is more forgiving, and its own guidance adds a detail worth acting on. The player adapts to whatever shape you give it, and for shapes like 9:16 on a desktop browser it adds padding itself — white by default, dark grey under the dark theme. Its advice is explicit: avoid adding padding or black bars directly to your video, because baked-in padding interferes with the player's ability to resize itself to the viewer's device. In other words, do not try to make one file fit both shapes. Render the shape you want.
| The tempting shortcut | Why it backfires |
|---|---|
| "I'll render it wide and crop it to vertical later." | Cropping 16:9 to 9:16 discards roughly the outer half of every frame, and the shots were composed for the wide frame. Pick the shape before the render, not after. |
| "The setting says HD, so it will be accepted anywhere." | A button labelled HD is not a specification. Spotify's direct video upload asks for at least 1920×1080, so HD in the colloquial sense and HD in the requirements sense are not the same number. |
| "I'll add black bars so the same file works everywhere." | YouTube specifically advises against baked-in padding, because it stops the player adapting the frame to the viewer's device. A padded file looks worse in more places, not fewer. |
The same song, three containers, and one line nobody can talk their way past. Both resolution steps in this flow clear YouTube and Shorts comfortably and sit below Spotify's direct-upload floor, which is a planning fact rather than a verdict on any tool.
A Canvas deserves its own sentence, because people reach for an MV when they mean one. A Canvas is a three to eight second vertical loop that replaces the album artwork in Spotify's Now Playing view. It is not a short music video and Spotify does not pretend otherwise: its own guidance says the clips are only three to eight seconds long so they will not sync with the lyrics, recommends footage without talking, singing or rapping, warns against rapid cuts and intense flashing, notes that edges can be cropped on some phones, and suggests leaving the song and artist name out since both are already on screen. If you want a Canvas, cut one from a render; do not try to make the render be one.
The song has to exist first #
The MV flow opens with a choice of two sources: pick a track from your library, or supply an audio file. Until one of them is satisfied, the generate control stays disabled and the interface tells you plainly to pick or upload a track first.
The limits on a supplied file are: MP3, WAV or M4A, up to 30MB, and no longer than five minutes. There is a floor as well, and it is the one figure here worth reading off your own screen rather than off this page: the form rejects a clip that is too short and names the minimum when it does. Those are hard edges rather than suggestions, and the five-minute ceiling is the one most likely to bite, because it is shorter than a fair number of finished songs.
There is a second thing to know about the upload path, and it is the kind of thing a walkthrough should say out loud rather than bury. The flow carries a notice stating that direct local audio upload can be temporarily disabled in the MV flow, described as a measure to ensure better quality and stability, with the recommended route being to create a song first and then generate the MV from the song detail page or the library list. Whether that notice is showing on any given day is not something a written page can tell you. The practical rule is simple: if your plan depends on bringing in audio you made somewhere else, open the flow and confirm the upload tab is accepting files before you commit to a deadline.
Either way, the more reliable order of work is to make the track in the same place you are going to render the video. That is not a workflow preference so much as an acknowledgement of what the pipeline needs — a finished piece of audio with lyrics attached to it, which is exactly what a track generated in the library already is.
Working order. Example brief: a song about a night bus crossing a bridge, slow synth-pop, one distant male vocal, blurred pads under a dry drum machine, 93 BPM.
- Decide the destination before you generate anything. YouTube, Shorts, or a file to hand to someone else. That decision sets the shape, and the shape is the setting you cannot revise.
- Generate the track and listen to it end to end. The video is built from the finished audio, so anything you would change about the arrangement has to change here, while changing it is still cheap.
- Check the length against both ceilings. Under five minutes for the MV flow; under three if the destination is Shorts.
- Open the MV flow and pick that track from the library. Read the analysis panel before you touch anything else.
- Set aspect, resolution and style, then render once. Treat a second render as a decision with a cost, not as a re-roll.
Whatever the analysis reads out of the audio is what the storyboard gets written from — so it is worth seeing what it read before you spend the render, not after.
What the analysis reads #
Once a track is selected, the analysis runs on its own. The interface sets the expectation while it works: it says it is analysing your track for lyrics and genre, and that this is usually done within a minute, with a second message for slow cases noting that complex tracks can take a few minutes.
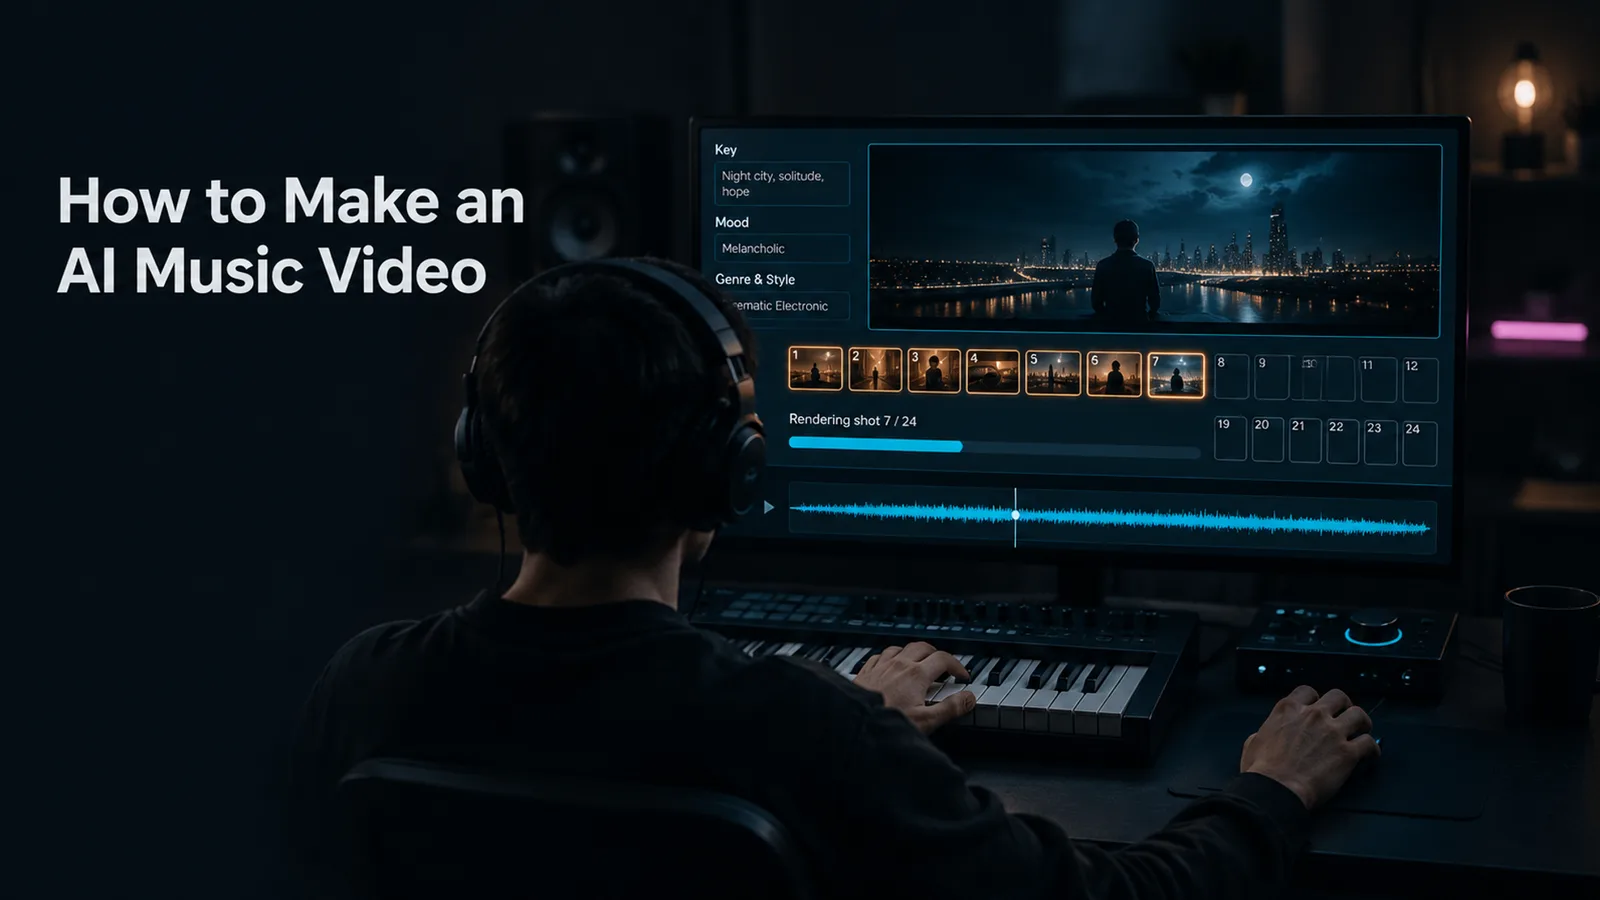
What comes back is the single most useful screen in the whole flow, and it is easy to click past. The result panel lists six things: Key, Mood, File, Genre & Style, Primary Emotions and Keywords. That is the machine telling you, in words, what it believes your song is. Everything the storyboard stage does next is written from those words.
Read them before you render. If the mood comes back as something you did not intend, or the keywords describe a song other than the one you think you made, that mismatch is not going to resolve itself during the render — it is going to be the basis of the visual plan. The cheapest fix at that point is usually to the audio, not to the video settings.
Worth noticing: the key and tempo the analysis reports are the same kind of reading you would get from a dedicated detector, and a genre with a lot of rhythmic ambiguity can produce a reading you disagree with. That is a property of tempo detection generally rather than of this flow in particular — there is more on where those numbers come from in what BPM actually means.
The lyrics field is a subtitle field
Below the analysis sits a lyrics box, and its label is doing real work: it reads Lyrics (used for MV subtitles). This is not a prompt, and it is not a place to write a treatment. It is the text that will appear on screen, timed against the vocal.
The interface attaches a warning to it that is worth quoting in full, because it describes a failure mode rather than a policy: you can fix typos, but heavy edits may cause subtitles to drift from the vocals. The reason is mechanical. The timing is derived against the vocal that is actually in the audio. Correcting the spelling of a name changes the characters on screen without changing how many syllables are being sung. Rewriting a line changes both, and the second half of the song pays for it.
So the practical rule is narrow and easy to follow: correct spellings, capitalisation, and proper nouns the transcription got wrong. Do not improve the writing. If the lyrics genuinely need rewriting, that is a change to the song, which means going back one step and regenerating the audio — see the prompt formula for how to specify that change deliberately rather than by trial.
If there is no vocal at all, the flow says so: an instrumental track is detected as one, and the interface states that the MV will be generated without lyric subtitles. That single behaviour is the entire difference between what people call a lyric video and what they call a music video inside this pipeline. Same four stages, same storyboard logic, subtitles on or off.
Choosing a look #
The art style is the one creative control that reaches all the way through to the rendered frames, and it is the main lever you have on consistency.
The flow ships with a set of system styles, named rather than described. Glitch Noir, Tropical Noise, Daydream Film, Petal Glow, Electric Chaos and Analog Warmth were the ones on offer when this was written, the last of them carrying a membership badge — but the section sits behind a See More control, so read it as a list that grows rather than a fixed set. Alongside them sit a My Styles section for styles you have saved from previous generations — empty until you save one, with the interface saying as much — and a Custom option.
You can also decline to choose. The interface is clear about what happens then: if you do not pick a style, one is matched automatically from the track's genre and style analysis. That is a reasonable default and a poor habit. A named style is a constraint, and in a renderer that produces each shot as a separate generation, constraints are the only mechanism you have for making shot two look like it belongs beside shot one. Picking a style is the cheapest consistency available in the whole flow, and declining to pick one hands that decision to a genre label.
There is a cover image setting too, which is worth understanding because it behaves differently from everything else on the page. You can supply your own cover — JPG, PNG or WebP up to 10MB, with square images working best — and the interface notes that a new cover only affects MVs and lyric videos generated after the change, leaving existing videos untouched. That is the sane behaviour, but it means the cover is part of the render inputs rather than a piece of metadata you can revise later.
Storyboard, shots, merge #
Stages two through four run without you, but what they are doing determines what you should expect to get, so it is worth being concrete.
The storyboard stage writes a shot-by-shot visual plan from the analysis. The rendering stage then generates the shots, and the progress line counts them individually — rendering shot four of twenty-two, and so on. The merge stage assembles the result against the audio and produces the final file.
The phrase to sit with is shot by shot. Each shot is its own generation. Nothing in that architecture guarantees that a person in shot four is the same person in shot eleven, or that a room seen twice is the same room. Continuity across separately generated images is genuinely hard, and no amount of prompting from the outside fixes it, because you are not prompting the individual shots.
Plan for a sequence of images with one consistent look, not a continuous scene with recurring characters. That is what this kind of renderer is good at, and expecting the other thing is the most common way to be disappointed by an otherwise fine render.
In practice that rules out a few things it is better to rule out in advance: narrative continuity across the song, a recognisable performer appearing throughout, and lip sync of any kind. It leaves a fairly wide set of things it does well — mood pieces, texture, abstraction, cut-driven visuals that move with the track, and lyric-led videos where the subtitle line is carrying the meaning and the image is carrying the atmosphere.
One operational detail: the flow allows one MV per song at a time. Start a second render of the same track while the first is still running and it will tell you an MV is already being generated for that song. Different songs can queue independently, but a single track is a single job.
When it finishes, the result screen reports the duration, the credits actually consumed and the creation time, and offers two downloads: the MP4 and the cover image. There are also Retry and Create another controls, plus share links out to the usual networks. Treat Retry as what it is — another full render, with another cost.
What it costs, and how long #
Two numbers matter before you commit, and the interface shows both of them in a dock at the bottom of the form: an estimated render time and an estimated credit cost, alongside the video model and clip count selectors.
The important word in both cases is estimated, and the flow is unusually honest about it. Rather than displaying a fixed price, the panel fetches the actual credits required for the configuration you have selected, showing a state while it does. That means the cost is a function of what you asked for — length, resolution, and how much there is to render — rather than a flat rate you can memorise.
The dock does not fold everything into one number, though, and the part it leaves out matters before the first click rather than after: the charge arrives in two parts. A script fee is taken first, for writing the storyboard, and the video fee is quoted separately as a later charge, applied when you confirm the render. That split shows up in the dialogue that appears if you abandon a project, which states that the script fee already spent is not refunded — so the cheap-looking first step is money already gone by the time you decide the storyboard is not what you wanted.
This has a practical consequence that is easy to state and easy to ignore: do not plan a budget from a number you read in someone else's screenshot, including a screenshot of this flow. Configure the render you actually want, wait for the estimate to resolve, and read your own figure. If the balance is short, the interface says so in terms of both numbers at once, naming what the MV needs and what you currently hold.
Render time is measured in minutes rather than seconds, and the flow quotes a range rather than a single figure — which is the correct shape for a job whose length depends on how many shots the storyboard called for. Plan around it being a job you start and come back to, not something you watch.
The connection back to the container: because aspect ratio and resolution are fixed at render time, the container decision is also the budget decision. A change of mind about the shape is not an edit, it is a second render at full price. This is the strongest practical argument for settling the destination before anything else happens.
Where the file is going #
You now have an MP4. Getting it in front of people is a separate problem with its own requirements, and they differ more than people expect.
YouTube
A 16:9 render is an ordinary upload and there is nothing special to do. A 9:16 render is Shorts territory, and the Shorts rules are worth having straight: short-form videos run up to three minutes, uploads are supported to a maximum resolution of 1080p, and titles can run to 100 characters. Since 31 March 2025 a Shorts view has counted every time a Short starts to play or replay, with no minimum watch time, and the older watch-based metric has been renamed Engaged views — which is still the number Partner Programme eligibility and Shorts ad revenue sharing are based on, so do not read raw view counts as revenue signals.
The one thing to avoid is the temptation described earlier: do not bake padding or black bars into the file to make it fit both shapes.
Spotify
This is where an AI-rendered music video meets the most friction, and none of it is about the AI part.
Spotify has two delivery paths for music videos. The primary one, by Spotify's own description, is through a label or distributor, who handle delivery and pay streaming royalties. The second is a direct upload inside Spotify for Artists, which Spotify describes as being in beta with a limited group of artist teams and a waitlist for everyone else. If you can use it, the requirements are specific: the video should be music-first with the song as the main focus, landscape 16:9, longer than 30 seconds, shorter than 20 minutes, under 50 GB, and at least 1920 by 1080 pixels. Videos longer than 30 seconds can earn royalties and may be eligible for charts, as audio does.
Then there is the part that surprises people, because it has nothing to do with the file at all. Spotify uses songwriter and publisher data registered with the Mechanical Licensing Collective to decide whether a music video is eligible for distribution in the US. To enable a video for US streaming, every songwriter on the underlying musical work has to have signed up with the MLC, registered the work with it, and opted in to Spotify's Direct Audiovisual Licensing Agreement through the Harry Fox Agency. Once all of that is done, Spotify says it may take up to seven days for the video to be enabled.
That process is the same whether the video was shot on a beach or rendered by a pipeline, and it is the reason a finished MP4 is not the same thing as a music video on Spotify. If a track is heading there, start the publishing side early; it runs on a slower clock than the render does.
What you have to declare #
There is one more step, and it takes about four seconds.
YouTube requires creators to disclose when they have used AI to meaningfully alter or generate photorealistic content. The categories it names are content that makes a real person appear to say or do something they did not, content that alters footage of a real event or place, and content that generates a realistic-looking scene that did not actually occur. So far, so much about deepfakes rather than music videos.
But the same page carries a list headed "Examples of content creators need to disclose", and the first item on it is, word for word, AI generated music. Whatever you conclude about how a stylised render sits against the photorealism test, the music underneath it is named explicitly.
The list of things you do not need to disclose is just as informative, and it is longer than people assume: clearly unrealistic or animated content, beauty and colour filters, background blur and vintage effects, production assistance such as generating outlines, scripts, thumbnails, titles or infographics, caption creation, sharpening and upscaling, idea generation, cloning your own voice for a voiceover, and AI-extended backdrops. Auto-captioning a video does not require a disclosure. The generated music in it is a different matter.
The mechanics are trivial. The disclosure is made in YouTube Studio during upload, under Attributes, where there is an "AI use" question with a yes-or-no answer. For photorealistic AI content the resulting label appears on the player itself; for non-photorealistic or animated content it sits in the expanded description. YouTube states plainly that disclosing AI content will not limit a video's audience or affect its eligibility to earn money, and on the other side, that failing to disclose consistently can bring penalties including removal of content or suspension from the Partner Programme.
There is also automatic labelling to be aware of. YouTube applies labels on its own to content made with its own generative tools, content that arrives carrying C2PA metadata, and content its systems detect. An erroneous automatic label can usually be corrected through the AI disclosure survey — with three exceptions that cannot be adjusted: content made with YouTube's own AI tools, content carrying C2PA metadata, and content labelled after a manual review.
- Answer the AI use question honestly at upload. By YouTube's own statement it costs nothing in reach or monetisation.
- Expect a label you did not add. Automatic labelling exists, and metadata travelling with a file can trigger it.
- Do not rely on being able to remove one. Three categories of automatic label are final.
- Check the policy again before a launch. This is a fast-moving area of platform policy.
The short version: treat the render as the middle of the job rather than the whole of it. Settle the destination, then the shape, then the resolution, before the song is even finished. Make the track where the video will be made, read the analysis panel instead of clicking past it, pick a named style rather than letting a genre label pick one, and expect a sequence of images with one look rather than a continuous scene. Then budget real time for the publishing side, and declare the AI use at upload, because by the platform's own account that declaration costs you nothing.
From a finished song to an MP4 #
Every stage described above assumes something that is not free to arrange: that the audio and the renderer are in the same place. The analysis stage has to read a finished track, the subtitle timing has to be derived against a real vocal, and the upload path — whenever it is switched off — leaves the library as the only reliable way in. A workflow split across two tools has to solve all of that by hand, and one of the two tools may not let you export at all.
That is the join our own pages are built around rather than any claim about render quality. MuseGen's song maker produces the track, with lyrics attached to it, in a library that music video generation can read directly — so the step where most people lose a morning simply is not there. If the lyrics are the part you are still working on, the lyrics generator sits upstream of both.
The limits are the ones set out above and they are worth repeating rather than hiding: the render is shot by shot, so continuity of character is not on offer; the output tops out below 1080p, in 16:9 or 9:16; the source track has to come in under five minutes; one MV per song runs at a time; and neither resolution step clears Spotify's direct-upload floor. None of that is a reason to avoid the tool and all of it is a reason to know the destination before you start.
The honest summary is that the render is the cheap part of making a music video and always was. What costs you is choosing the wrong container, feeding the pipeline a song you had not finished, or arriving at an upload form without the paperwork the platform wanted. Every figure on this page comes from the interfaces and help centres named below — check them again before you plan a release around any one of them, including ours.
FAQ #
How do I make an AI music video from my own song?
You start with a finished track, not a text prompt. Open the MV flow, pick the song from your library or supply an audio file, and let the analysis step read it. Then choose an aspect ratio, a resolution and an art style, and start the render. The tool writes a shot-by-shot storyboard from the analysis, renders the shots one at a time, and merges them against the audio. The output is an MP4 you download.
What aspect ratio should an AI music video be?
It depends entirely on where the video is going, which is why the choice comes first. YouTube's standard aspect ratio on a computer is 16:9. Vertical 9:16 is the shape for YouTube Shorts and for short-form feeds generally, and YouTube notes that a 9:16 video played on a desktop browser gets padding added by the player. Spotify's direct video upload asks for landscape 16:9, while a Spotify Canvas is vertical. Cropping a finished 16:9 render down to 9:16 throws away the sides of every shot, so pick the shape before you spend the render.
How long can an AI music video be?
In MuseGen's MV flow the ceiling is set by the source track, which has to clear a short minimum length and come in under 5 minutes. The destination has its own limits on top of that: YouTube Shorts runs up to 3 minutes, and Spotify's direct video upload wants something longer than 30 seconds and shorter than 20 minutes. The binding constraint is whichever of those is tightest for your plan, so check it before you generate the song rather than after.
Can I upload my own audio file to make a music video?
The flow supports MP3, WAV and M4A files up to 30MB and up to 5 minutes, with a short minimum length enforced at upload. It also carries a notice saying that direct local upload can be switched off in the MV flow for quality and stability reasons, with the recommended route being to create a song first and then generate the MV from the song detail page or the library list. Check that the upload tab is actually accepting files before you build a deadline around it.
Do AI music videos have lyric subtitles?
They do when the track has lyrics. The lyrics field in the MV flow is labelled as the source for MV subtitles, and the timing is derived against the vocal. The interface warns that you can fix typos but that heavy edits may cause the subtitles to drift from the vocals, which is the practical rule: correct spellings, do not rewrite lines. If the track is detected as instrumental, the video is generated without subtitles.
Do I have to disclose that a music video was made with AI?
On YouTube, the requirement is framed around meaningfully altered or generated content that looks realistic, and the help page's list of examples creators need to disclose opens with AI generated music. The disclosure is made in the upload flow under Attributes, and YouTube states that disclosing does not limit a video's audience or affect its eligibility to earn money. It also warns that failing to disclose consistently can lead to penalties including removal of content. Given that the declared cost of disclosing is zero, the practical answer is to tick the box.
Can I put an AI music video on Spotify?
Not simply by up a file. The primary route for music video delivery to Spotify is through a label or distributor. Spotify for Artists also has a direct upload, which was in beta with a waitlist when this page was written, and it asks for landscape 16:9, longer than 30 seconds, shorter than 20 minutes, under 50 GB and at least 1920 by 1080 pixels. Separately, US availability depends on the songwriters on the underlying work being registered with the MLC and opted in to Spotify's audiovisual licensing agreement through HFA.
What is the difference between a lyric video and a music video here?
Inside this pipeline, the difference is one switch rather than two products. Both run the same four stages, and what changes is whether timed lyric subtitles are burned into the render. A track with lyrics produces subtitles by default; a track detected as instrumental does not. The visual plan itself is written from the audio analysis either way, so a lyric video is not a simpler render, just a captioned one.
Keep reading #
-
How a Chai Ki Tapri Song Went Viral — what happens after the video exists: the vertical-first posting pattern that actually moved the track.
-
The AI Music Prompt Formula — how to specify the song the video will be built from, slot by slot.
-
Suno Download Limits: What Changed — why the export step is the one to check first when a video timeline is waiting on the audio.
-
The 10 Best AI Music Generators of 2026 — where the song comes from, and which tools will hand you a file at the end of it.
Sources #
- YouTube, "Video resolution & aspect ratios" — YouTube Help for the 16:9 standard aspect ratio on computers, the player padding behaviour for 9:16 on desktop browsers and its default colours, the advice against adding padding or black bars directly to a video, and the encode resolutions including 1920×1080, 1280×720 and 854×480.
- YouTube, "Get started creating YouTube Shorts" — YouTube Help for the three-minute Shorts length, the maximum upload resolution of 1080p, the 100-character title limit, and the March 2025 change to how Shorts views and Engaged views are counted.
- YouTube, "Disclosing use of GenAI content" — YouTube Help for the disclosure requirement and its three named categories, the examples list whose first entry is AI generated music, the list of things that do not require disclosure, the Attributes step in the upload flow, the statement that disclosure does not limit audience or monetisation, the automatic labelling cases including C2PA metadata, the three label types that cannot be adjusted, and the stated penalties for repeated non-disclosure.
- Spotify for Artists, "Up videos in Spotify for Artists" — Spotify for Artists Help for the beta status and waitlist, the music-first requirement, the landscape 16:9 shape, the 30-second floor, the 20-minute ceiling, the 50 GB limit, the 1920×1080 minimum, and the note that videos longer than 30 seconds can earn royalties and may be chart-eligible.
- Spotify for Artists, "Music videos on Spotify" — Spotify for Artists Help for the two delivery paths, the statement that label and distributor delivery remains the primary path, and the note that MLC-registered songwriter and publisher data determines US distribution eligibility.
- Spotify for Artists, "Music video publishing rights and clearances" — Spotify for Artists Help for the three requirements for US availability — MLC sign-up, work registration, and opting in to Spotify's Direct Audiovisual Licensing Agreement through the Harry Fox Agency — and the up-to-seven-days enablement window.
- Spotify for Artists, "Canvas guidelines" — Spotify for Artists Help for the three-to-eight-second length, the vertical 9:16 ratio, the 720 to 1080 pixel height range, the MP4 or JPG formats, the statement that the clips will not sync with the lyrics, and the guidance on cuts, flashing, cropped edges and on-screen text.
- Udio, "Changes associated with the Universal Music Group (UMG) partnership" — Udio Help Centre for the statement that down of audio, video and stems has been disabled.
- Suno Help Centre — enumerated on 16 September 2026 across all of its categories; no article documenting a music video or lyric video feature was present, which is the basis for the statement in the first section.
- MuseGen MV generation — the source of every description of this flow: the four pipeline stages and their captions, the three user-facing steps, the audio format and duration limits, the notice regarding temporarily disabled local upload, the analysis fields, the lyrics subtitle label and its editing warning, the instrumental detection message, the named system styles and the automatic style matching, the 16:9 and 9:16 choice, the Standard and HD resolution steps, the two-stage fee structure and the fetched credit estimate, the one-MV-per-song rule, the cover image requirements, and the result screen.