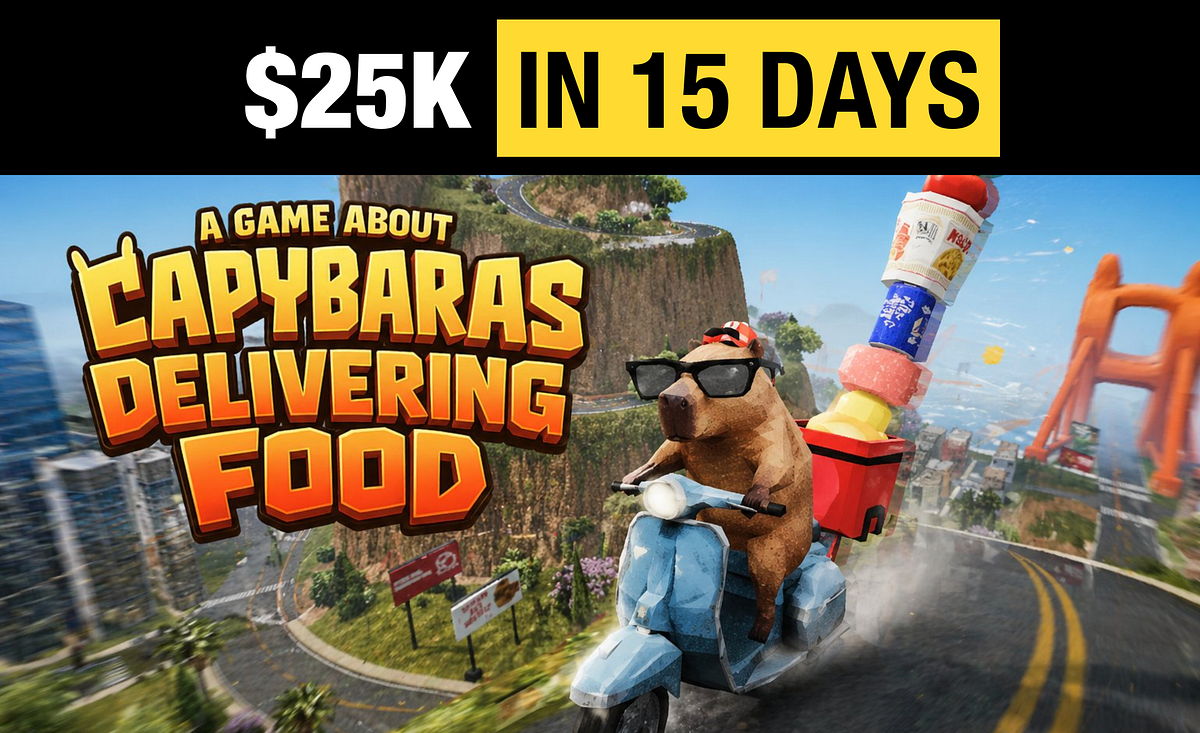
What it actually took to vibe-code a game that won the 2026 Vibejam #
Introduction #
I'm proud to announce my game won #Vibejam2026. This article breaks down a huge part of the workflow and the development details of my entry for the event. The prize was $25k USD.
As an iOS Software Engineer for almost 9 years, this was the first time I tried developing a game. You can play it below, then come back to continue reading.
About vibejam
It’s a game dev competition hosted by @levelsio where 90%+ of the code must be written by AI. The event ran through April 2026, and I had to submit the code in accordance with the event rules.
“The event is also an open benchmark for how fast AI coding is improving. Every edition measures what a solo developer with an AI copilot can ship in a single month — and every year the games get noticeably better. 2026 is the second run.”
This year’s edition was sponsored by Cursor, Bolt.new, Glif, and Tripo AI.
About my game
A Game About Capybaras Delivering Food is a single and multiplayer game where you control a capybara on a scooter, carrying a pile of food that has to be delivered on time.
The core loop is three parts:
Accept orders from your phone, each with a different difficulty (more items, easier to drop).The mini-mart minigame: rush through a convenience store to collect the requested items before the time runs out, on a slippery floorA physics-based stack strapped to the back of the bike that tilts, leans, and topples depending on how you drive.
Around that loop, I built a world worth exploring, full of small, funny details, with distinct areas like the city, suburbs, and countryside, plus monuments riffing on Christ the Redeemer, the Hollywood Sign, and the Golden Gate Bridge.
About vibe coding
Vibe coding is a way of programming where you describe what you want in plain language, and the AI writes the actual code. Instead of worrying about syntax and implementation details, you describe the “vibe” or intent of a feature. It’s less like speaking to a machine and more like handing your requirements to something like a super programmer.
In practice, I spent most of my time brainstorming, planning, and playing rather than generating code. I ran 2–3 Claude Code sessions at once, each working on a different part of the code to avoid conflicts. New features always used a fresh session with no context; I kept one long-running session for bugs that needed more context of what was already built.
Define the project rules
Claude Code rules are instructions and guidelines you set for Claude Code. As a starting point, I dropped the VibeJam rules into Claude’s /rules
folder, alongside coding conventions that aren’t obvious to the model but mattered for this project. Not following the jam rules could eliminate me from the event.
Planning with plan mode
/plan
mode is a feature that lets the AI study your whole project, research online, reason, run commands, explore, and brainstorm before touching a single file. It then writes out a plan as a document file and asks whether it can proceed. You can keep refining that loop until you're happy with the plan.
You can plan every feature before implementing it, and saving the plan to a file lets the LLM reference it again if the session is terminated.
To make the plan mode even more powerful, I combined it with the game-creator Skill https://github.com/PlayableIntelligence/game-creator, which gives Claude extra Three.js game-dev context and knowledge.
⭐️ Tip: ask Claude to
interviewyou back. This helps it implement the feature the way you actually want it.
Avoiding the /loop usage
/loop
lets the AI run tasks automatically over and over, without constant manual input. It works well when the AI can judge its own output and degradation workflows: it tries something, scores the result, and then keeps iterating until it hits a target you set, as long as you give it enough context.
This project needed a lot of manual validation and gameplay, so /loop would have burned all my tokens blindly testing toward a result that couldn’t satisfy me as a player, losing quality at every failed iteration. Instead, I worked in many small iterations and validated each one myself.
The overall workflow was simple:
I think, Claude researches, we brainstorm, Claude plans, I approve, Claude generates, and I test.
By the numbers
Tools:
Code: Claude Code (Opus 4.7) and Three.jsSkill:https://github.com/OpusGameLabs/game-creator** Textures & illustrations:GPT images 2 and Grok 3D models:Tripo3d Music & SFX:**Suno and ElevenLabs
Cost to develop (values in USD): Made with AI:
-
100% of the code (188 commits, 27k lines of code)
-
The logo, illustrations, textures, and 3D models
-
The music and SFX
-
All the tooling (the in-game editor, cutscene maker) Made by hand:
-
Writing the prompts for code, art, audio, and 3D
-
Playing the game, fine-tuning the feel, and placing the cameras for cinematics
-
Spotting development gaps and asking AI to build tools to help fill them
Development timeline
It took around 15 days to finish and submit my game on time. Many late nights, though.
Check the game's evolution comparing my
[first post]vs[submission post].
First Week #
Inspiration and concepts
The inspiration sat somewhere between Death Stranding (post-apocalyptic courier delivering supplies) and Easy Delivery Co. (a driving sim where you control a cat delivering packages in its little truck): the curvy stacked-items mechanic, the PSX-style graphics, or simply a combination of both.
The final look of the game wasn't there from the start; much of the gameplay loop, visuals, and mechanics took shape throughout development.
From concept to 3D
I had the idea in mind (the capybara and scooter), but the details were still blurry, so I brainstormed with Grok/GPT. I asked them to generate a sheet with variations in style, shape, and character design, then iterated on top of it until I was satisfied. I even tried to draw the capybara on the scooter for reference (it didn't work well).
Why not automate this?Some participants used automated in-game image-generation workflows, but I wanted more control over the result before deciding whether to add it to the game.
Here are some examples of the creative process behind the main character creation.
Next, prepare the design for 3D: ask the LLM for at least 3 angles (FRONT, BACK, LEFT-RIGHT SIDE). The more angles you provide, the better the 3d generation, without letting AI "guess" what you want. You can see the prompts in one of my chats here.
Then I used Tripo3D for the image-to-3D: drag and drop your pictures, select the texture quality, and the number of squares/triangles. The process was the same for every item or visual asset in the game
Not everything worked in one shot. Some models took far more trials than they should, which cost credits. This bridge, for example, still has issues after 20 generations. You can see the problems in its side details. For every generation, you have to fine-tune the squares/triangles, play with the smart mesh and the texture, and improve the visibility of the uploaded images, all of which vary from object to object.
Debug panel and constants
You don’t want to waste tokens asking the LLM to fine-tune things you can do yourself. Instead of “make it faster” or “make it bigger”, add a /rule
making every object property editable via sliders or input fields and saved to a config.
Player controls
Starting with the basics, I wanted vehicle controls with drift mechanics, collision, and a camera following the bike. I built a sandbox map to drive around, test collisions, and tune the feel with the debug panel. When drifting, the line at the back changes color to show the boost you’ll get on release; there’s a “high speed” effect, and the camera shakes a bit.
Here’s the evolution over the first few days:
Item physics
The main mission is to deliver food from A to B on time without dropping it. The first version had the basket items sliding side to side, but I wasn’t satisfied. The GIFs below show the evolution.
At some point, I tried stacking the items on top of each other. Moving left and right created an arch, and past a threshold, the items could drop. I refined the values to make it less realistic (physics-oriented) and more fun (a % chance of falling once past the threshold), which is much more unique and fun.
Phone simulator: Part I
This is where you receive the mission of collecting the food.
I asked Claude to design a phone simulator with iOS-like animations and visuals, and it one-shot the whole thing in CSS. The animations were impressive from the first version.
I later polished the phone UI to make it more realistic and comical: slide-to-unlock over a lock screen of a capybara taking a mirror selfie, an iOS-style notification badge, working volume buttons, and “Capyfied” versions of real apps, for example, CapyMaps works like Maps, and Capify is a music app that actually plays music in the game.
The Capybara playlist used in the game is on YouTube, proudly made by
[!]@peluucs Inconvenience Store
The mini-mart adds a challenge to getting the food. Instead of fruits just appearing on the back of the bike, I wanted the player to go into the store and hunt for the requested fruits, with some extra spice:
-
Spot the shopping cart that appears randomly
-
Find each fruit on the order list
-
The floor is slippery, and the walls bounce you back
-
The banana peel (removed from the game)
-
More fruits mean more bonus, but they're easier to drop, which loses points
-
All this under 60 seconds (later reduced to 45 seconds) 😂Fun fact: even after the Jam, the judges still don’t like my convenience store, mainly because it's so hard to move around.
Getting from the world map to the mini-mart uses a scene switcher with in/out animations. I later dropped an early idea of randomly generated shelves and floor hazards in favor of static shelves with randomly placed items on the ground.
The convenience store’s evolution was my favorite. I reworked the camera perspective, added lighting and animations, and replaced the default shelves and items with real 3D props. Combined with the right sound effects, the result was amazing.
In the next section, you’ll see how I set up cameras, animations, and more with the Editor tool.
The map (attempt 1)
I first tried a map fully generated by LLM: Grok for the illustration, Tripo3d to convert to 3D. But it’s very hard to get granular control over the city details, the quality fell apart when zoomed in, and the whole map was a single piece, which is not optimized for the game and is bound to cause issues.
So how do you get a fully customized, handcrafted map?
The Editor Tool
To build a handcrafted map, I needed an editor: place items where I wanted, use brushes to “paint” terrain and mountains, and generate procedural roads. A big part of the game’s uniqueness comes from this map.
“Claude, create an editor tool with terrain construction and an entire road system with light poles and a sidewalk. Make no mistakes.”
The editor was very simple and personal; I didn’t work much on improving the interface of the panels. They’re just floating windows, but it worked fine.
Some of the capabilities available in the editor:
-
Place, delete, move, rotate, and scale objects
-
A brush to raise, lower, smooth, and flatten terrain
-
A brush to paint grass, dirt, water, and other visuals
-
A road system with intersections, light poles, and sidewalks
-
Cameras and in-game cinematics (added in the second week) I forgot to ask for a Ctrl+Z until second week through building the map.
To open the editor, I added an ?editor
endpoint. Later, I split the editor from the main code so Claude could update the game without re the editor and wiping my changes (which happened a few times).
Road builder tool: Part I
The very first version of the road builder was too simple, so I kept adding features and fixing bugs. Usability: click points on the terrain, and it draws a smooth curve between them, lays down asphalt or dirt, and carves the ground so the road sits flat, with the terrain blending back at the edges. The road also appears in the CapyMaps app on the phone, showing the shortest route to the destination.
Building the map by hand
Since getting AI to generate the map the way I wanted was so hard, I used the editor to build it manually. This is the only “heavy” manual work I did. I had a “European”-style city in mind, but it went the opposite direction as you will see.
The idea I had was to put the convenience store at the very top of the main mountain of the map, visible from anywhere, with a magical light coming from the sky, then build the city around it. After many iterations and hours, I had a genuinely playable city.
Day and Night cycle + Rain
These were extras. They could have come later, but one of my Claude sessions was idle, so I asked it to implement them.
Animations
This was tricky. I didn’t export the model with joints because of the scooter, but each piece was mapped by Tripo3d, so I asked Claude to animate the wheels when turning, move the head, and vibrate the bike when idle.
Here’s the result:
Multiplayer
Multiplayer was simpler than expected for a jam. A single global city/lobby hosts the room over a live WebSocket on Cloudflare. As players join, their position and item stack are relayed to everyone else.
Bandwidth grows with the square of the player count: every rider broadcasts ~10x/sec, and the server relays each message to all other players. 5 players is okay; 50 players means fanning out 50 messages to 50 clients, 10x a second.
You can also send messages, honk, and even hear what nearby players are listening to.
I didn’t do heavy optimization or pay for expensive servers. A few things stay client-side only to keep it light: the day/night cycle, rain, particles, and drifting.
End of first week results #
By end of the first week, we had:
- Main character, stacked item physics, collision
- Convenience store 90% polished
- Phone with simple apps
- Wired mission loop (receive order + minigame + deliver)
- Weather and day/night cycle
- Map development started
- Editor tool with terrain builder
- Multiplayer logic
- Simple SFX + some of the final music
Second Week #
Polishing the materials
With the core mechanics defined, it was time to give the game the visuals it deserved. I went for a PS1-style visuals: low-res images, limited colors, reduced resolution. PS1 was a very limited console, so the right textures, color depth, mapping, and filtering get you that look.
I highly recommend
[this article]by Roman Liutikov for reproducing these effects in Three Js.
ChatGPT Images-2 had just been released, so I generated realistic textures, resized them on free websites, and applied them to the game.
The same process replaced the mockup trees with 2D textured ones.
For PS1-style trees, I asked Claude to place the flat foliage PNGs in an X shape (2+ crossed planes): “Create two flat planes, place them one on top of the other, and rotate one by 90° to form an “X” when viewed from above.”
I generated textures for every material too (asphalt, grass, dirt, wood, sand, water, farmlands), and Claude swapped the old “green” brush I’d painted for the real textures. On the right you can see the final result combining the textures and map polish.
Road builder tool: Part II
The final road builder details improved crosswalk generation and added procedurally generated sidewalks, light poles, lane marks, guardrails, fences, and banners.
Working on the map
The most fun but the most time-consuming part. I added references to Christ the Redeemer, the Golden Gate Bridge, and the Hollywood sign. The city is a mix of everything I thought it would be cool.
The map evolved into what you can see below: the fog improved (which amplifies the sense of scale), the sky got a noise texture to mimic the clouds, and the financial and suburban districts are now clearer than before.
One of my favorite parts is the “countryside”, a different landscape from the city: dirt pathways, a farm, and simpler houses next to a highway.
From another angle, you can see how Christ the Redeemer sits in the landscape. I first thought about a lake, but it became a beachside next to the city.
Cutscene Editor
The game opens with a cutscene before jumping into gameplay. It gives the player context and makes the whole thing feel like a real game. Here’s a preview:
You can watch the first 4 minutes of gameplay with sound
[here] Let's start with the overall view of the cinematic editor UI, and then I'll walk you through some cool details. This editor was created in a way that I could visualize the progress of the cutscene in a timeline, just like a real video editor, while making it easy to insert or remove clips, move them around just by drag-and-drop, insert time skips, music, transitions, and overlays. It's visually messy, but delivering the game was more important.
All scenes are recorded in-game and replayed in real time, so if other players are online, they appear in the intro too.
Recording
First, I recorded the capybara around the city. The “Record” tool lets me place the bike anywhere on the map and drive while capturing the path.
Camera positioning
With the path set, I arranged cameras around the city for nice takes. This also helped populate the on-screen details around each area.
Each camera has its own properties: animations, FOV, transitions, and even changes the time of day for each camera. Then, I could just wire them to a specific block in the timeline.
Menu
The cinematic cameras could be reused in the game menu via a “Use in menu” checkbox.
Localization
So far, the game supports English, Brazilian Portuguese, Spanish, Korean, Mandarin Chinese, German, and Hindi. Claude did well on the languages I know, with a few tweaks needed. And for the rest, I’ll probably use another agent to validate.
Launching the game
The last step was the thumbnail for the Vibejam website. After a few references, ChatGPT kept the low-poly style well, though it messed with the background light, the side roads, and the Christ the Redeemer mountain at the back.
The game was submited here
[https://vibej.am/2026/#games]
Final Result #
The final result can be seen by yourself!
What did I learn? #
Compared to last year, it’s clear AI coding has crossed a threshold. A few takeaways:
- Quick dopamine, low-cost MVPs: you can stand up a playable mechanic in an afternoon.
- Time shifts from coding to deciding: you spend less time coding and more time typing, planning, testing, and taste-making. That’s the real bottleneck now. Many people struggle to write good prompts, meaning a clear thought turned into text.
- Tooling compounds: the biggest multiplier wasn’t the game code, it was asking Claude to build the editors that let me build the game faster. Every detail is built on demand.
Will I put this game on Steam?
No. This was a good game for a jam, and it should end there. For Steam, it would need to be more complete, like adding hours of enjoyable gameplay and a sense of progress. Right now it’s good for 5–10 minutes.
What's next? #
I enjoyed this project a lot, and AI gave me superpowers for building MVPs and testing ideas fast. Used right, it’s an amazing tool. Now I want to dive deeper into game development concepts and keep using LLMs to bring these ideas to life faster than ever. Perhaps you will see my games on Steam in the future.
Follow me on LinkedIn or X I will post about my new projects!