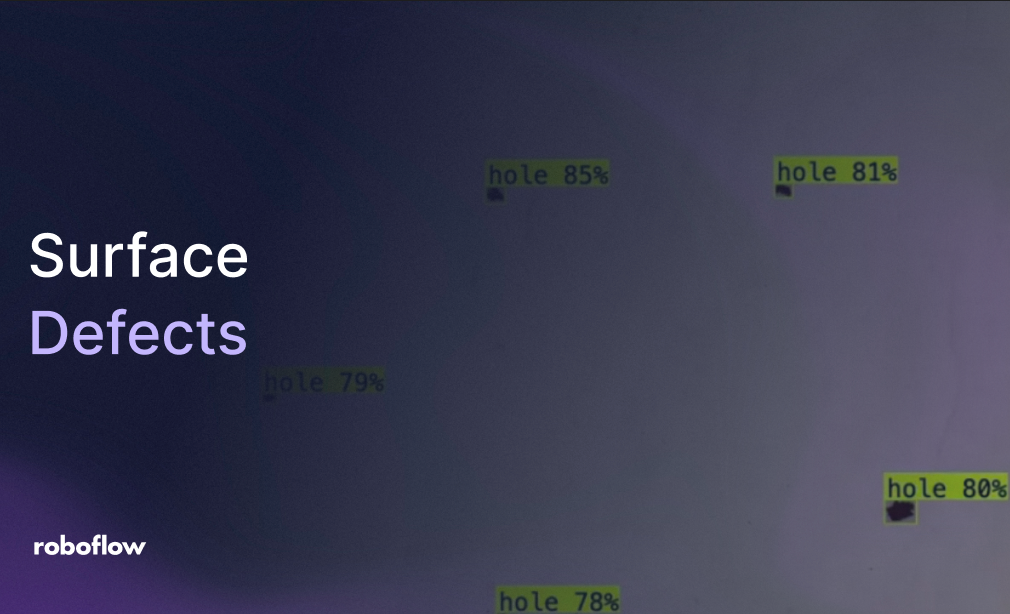
Computer vision automates surface defect inspection by using object detection models to instantly locate and classify visual irregularities across manufactured materials like wood, metal, and glass. By combining a custom RF-DETR model with automated grading logic in Roboflow Workflows, quality teams can instantly categorize product health, log inspection events, and confidently route or reject defective items on the production line.
Surface quality affects how a manufactured product looks, performs, and lasts. A small scratch may only reduce the visual quality of a product, while defects like crack, stains, discoloration, blisters, chips, pits etc. can indicate a more serious problem.
Traditionally, surface inspection is performed by people who visually examine products as they move through production. Computer vision can automate part of this process, saves time and converts detections into actions such as:
- Accept the product.
- Assign it to a lower quality category.
- Send it for rework.
- Request manual inspection.
- Reject it from the production line.
In this tutorial, I will first explain what a surface defect is, and where computer vision-based surface inspection can be used. I will then explain how to build a practical wood surface defect inspection system using an RF-DETR NAS object detection model and Roboflow Workflows.
The final Workflow will detect wood defects, count them by severity, display an inspection result on the image, record quality events, and automatically upload uncertain predictions for future model improvement.
So, let's get started.
What Are Surface Defects? #
Surface defects are visible irregularities, damage, or unwanted variations on the exterior of a material or product. They may appear during:
- Raw-material formation
- Cutting
- Casting
- Rolling
- Welding
- Machining
- Coating
- Painting
- Transportation
- Assembly
- Storage
A defect may only affect appearance, or it may indicate a structural, functional, or manufacturing problem. Computer vision is especially useful for defects that can be observed from images, including scratches, dents, cracks, blemishes, color differences, and material inconsistencies.
How Computer Vision Detects Surface Defects #
A surface inspection system generally follows this process:
The most appropriate computer vision task depends on what information the application requires. For this tutorial, we use object detection because the system needs to locate individual defects and count how many instances of each defect class are visible.
Where Surface Defect Detection Is Used #
Surface defect detection can be applied anywhere a product or material needs to be visually inspected. Computer vision can augment manual inspection by processing images consistently and making the results available to quality-management systems. Following are some use cases.
Metal Sheet Inspection
Metal sheets can develop scratches, dents, pits, discoloration, coating damage, and other surface defects during manufacturing. A camera can inspect each sheet as it moves along the production line. The system can mark damaged areas and send the sheet for review, rework, or rejection.
:
Read moreHow to Detect Metal Defects with Computer Vision.
Printed Circuit Board Inspection
Printed circuit boards can have small defects such as missing holes, open circuits, short circuits, mouse bites, spurs, and unwanted copper. Computer vision can inspect high-resolution PCB images and locate these defects before the boards are used in electronic products.
Read more:Build a Real-Time PCB Defect Detection System.
Textile and Fabric Inspection
Fabric can contain holes, stains, loose threads, cuts, wrinkles, color differences, and other weaving defects. A camera placed above the production line can continuously inspect the fabric and record where each defect appears. Damaged sections can then be repaired, removed, or assigned to a lower-quality product.
Glass Manufacturing
Glass products can contain scratches, cracks, chips, bubbles, stains, and damaged edges. Computer vision can inspect glass sheets, bottles, windshields, screens, lenses, and solar panels. Controlled lighting is important because reflections may look similar to real defects.
Read more:Glass Inspection with Computer Vision.
Ceramic Tile Inspection
Ceramic tiles can have cracks, holes, broken edges, chips, stains, or unwanted surface lines. Computer vision can inspect each tile after manufacturing and mark defective tiles before packaging.
Read more:Ceramic Defect Detection with Computer Vision.
Paint and Coating Defect Inspection
Painted surfaces of many finised products can have scratches, dirt, bubbles, orange peel, peeling, discoloration, or uneven coating. Computer vision can inspect car panels, appliances, metal parts, and painted products to find these defects before final assembly or shipping.
Read more:How to Detect Paint Defects with Computer Vision.
Tutorial: Build a Wood Surface Defect Detection System with Roboflow #
We will now build a surface inspection application using wood as the practical example. The system uses a trained RF-DETR NAS object detection model to detect eight classes:
Quartzity
Live_Knot
Marrow
Resin
Dead_Knot
Knot_with_Crack
Knot_Missing
Crack
The application that we are going to buils, performs following tasks:
- Filters predictions using different confidence thresholds for each class.
- Counts wood surface defects by class.
- Groups defects into severity categories.
- Assigns a custom quality decision.
- Visualizes the result.
- Records inspection events.
- Collects uncertain predictions for retraining.
Step 1: Create the Roboflow Project
Create a new project in Roboflow and select Object Detection as the project type. Give the project a descriptive name, such as wood-surface-defect-detection
. Upload images representing the expected operating environment. The dataset should contain:
- Different wood surfaces
- Different defect sizes
- Boards with one defect
- Boards with multiple defects
- Boards without target defects
- Different lighting conditions
- Defects near image boundaries
- Partially visible defects
- Similar-looking defect classes
- Small cracks and irregular knots
Normal images are also important. They teach the model that ordinary grain, color changes, and harmless surface patterns should not always be classified as defects.
Project Link:Wood Surface Defect Detection
Step 2: Annotate the Surface Defects
Draw a bounding box around every visible defect and assign the appropriate class. Use the same class names consistently:
Follow consistent annotation rules:
- Keep each bounding box close to the visible defect.
- Avoid including large areas of unaffected wood.
- Annotate every visible instance.
- Decide whether connected cracks should be one annotation or multiple annotations.
- Apply the same rule to every image.
- Review ambiguous knot classes carefully.
- Leave normal images without bounding-box annotations.
For small defects, close annotations are particularly important. Large boxes containing mostly normal surface can make it harder for the model to learn the actual visual pattern.
Step 3: Generate a Dataset Version
After annotation, generate a dataset version. Useful preprocessing and augmentation options may include:
- Auto-orientation
- Resizing
Step 4: Train an RF-DETR NAS Model
Train an RF-DETR NAS model using the generated dataset version. RF-DETR is Roboflow’s real-time transformer architecture for object detection and segmentation. Roboflow Neural Architecture Search starts from RF-DETR and searches for candidate architectures that balance predictive performance and inference latency for the dataset and target hardware.
model by selecting the
RF-DETR NAS* as*
backbone**. You may try with**
FAST****or
STANDARD****for more accurate models.
PLUS After NAS training, use the Model Explorer to compare candidate models. Select a model based on the requirements of the application:
- Higher accuracy for offline inspection
- Lower latency for conveyor-belt inspection
- Smaller architecture for edge deployment
- Better recall for critical defects
- A balanced model for general deployment
Roboflow’s NAS interface displays candidate models so that their accuracy and latency trade-offs can be compared.
Step 5: Evaluate the Model
Before adding decision logic, test the model on images that were not used during training. Review:
- Precision
- Recall
- mAP
- Confusion matrix
- Class-wise performance
- False-positive examples
- False-negative examples
- Small-defect performance
- Predictions on normal wood
Pay special attention to confusion between visually related classes such as Live_Knot
, Dead_Knot
, Knot_with_Crack
, Knot_Missing
, and also inspect the model’s ability to detect thin cracks. For critical classes, recall may be more important than using a very high confidence threshold.
Step 6: Create a Roboflow Workflow
In this step we will build a Wood Surface Defect Inspection and Quality Decision Workflow. Wood inspection is a great example of where computer vision becomes more useful when it goes beyond simply drawing boxes around defects. In this workflow, we use a trained RF-DETR object detection model to find defects on a wood board, then apply a custom decision layer that turns those detections into a practical quality result such as GRADE_A
, GRADE_B
, GRADE_C
, REWORK
, REJECT
, or MANUAL_REVIEW
.
This workflow is a custom defect-based inspection system. It is not intended to represent or replace any official timber grading standard. Instead, it demonstrates how to combine a trained Roboflow model, post-processing logic, visual annotations, active learning, and event logging into a production-ready quality inspection pipeline.
What This Workflow Does?
The Wood Surface Defect Inspection and Quality Decision System accepts an image of a wooden board and performs the following actions:
- Runs a trained RF-DETR object detection model on the image.
- Detects eight wood surface defect classes:
Quartzity
Live_Knot
Marrow
Resin
Dead_Knot
Knot_with_Crack
Knot_Missing
Crack
- Applies per-class confidence thresholds to remove weak predictions.
- Counts defects by class and severity group.
- Applies custom quality decision logic.
- Draws bounding boxes and labels on the original image.
- Displays a quality summary directly on the annotated image.
- Returns structured outputs for downstream systems.
- Optionally sends results to a webhook.
- Uploads uncertain predictions back to Roboflow for review and future model improvement.
- Logs quality inspection events to Vision Events for traceability.
At a high level, the workflow turns this:
“Here are some defect detections on a wood board.”
Into this:
“This board should be rejected because at least one crack was detected.”
Or:
“This board is Grade B because it has only minor defects and no moderate or critical defects.”
Workflow Architecture
The final workflow looks like following.
Let's understand how I build it.
Add the Image Input
Workflow requires input image or video. Start with an image input block. This block receives the wood surface image that will be inspected.
Add the RF-DETR Object Detection Model
Next, add an Object Detection Model block and select the trained RF-DETR NAS model.
Set the model confidence threshold to 0.25
. This threshold is intentionally low. It allows the model to return lower-confidence predictions. These predictions are useful for the active learning branch, where uncertain detections are uploaded back to Roboflow for review. The production decision path will use stricter class-wise thresholds before making the final inspection decision.
Add a Per-Class Confidence Filter
Different defect classes may need different confidence thresholds. For example, a thin Crack
may be harder to detect than a large Live_Knot
. Add a Per-Class Confidence Filter block after the RF-DETR model. Use these starting thresholds:
| Class | Confidence threshold |
|---|---|
Quartzity |
|
| 0.45 | |
Live_Knot |
|
| 0.50 | |
Marrow |
|
| 0.45 | |
Resin |
|
| 0.40 | |
Dead_Knot |
|
| 0.45 | |
Knot_with_Crack |
|
| 0.35 | |
Knot_Missing |
|
| 0.40 | |
Crack |
|
| 0.30 |
Only detections that pass these thresholds are used for grading and visualization. These thresholds can be adjusted later after testing the model on validation images and real production images.
Add the Custom Python Grader
The main decision logic is handled by a Custom Python block named wood_defect_grader
. Connect this block to the filtered predictions from the Per-Class Confidence Filter. The custom Python block does the following:
- Counts each defect class
- Calculates total defects
- Calculates critical, moderate, and minor defect counts
- Assigns the final quality decision
- Returns pass/fail status
- Returns detected classes, confidence scores, and coordinates
Use this code in the Custom Python block:
def run(self, predictions):
    target_classes = [
        "Quartzity",
        "Live_Knot",
        "Marrow",
        "Resin",
        "Dead_Knot",
        "Knot_with_Crack",
        "Knot_Missing",
        "Crack"
    ]

    counts = {name: 0 for name in target_classes}

    class_names = list(predictions.data.get("class_name", []))
    confidences_raw = predictions.confidence
    boxes_raw = predictions.xyxy

    detected_classes = []
    detection_confidences = []
    detection_coordinates = []

    for i in range(len(predictions)):
        class_name = class_names[i] if i < len(class_names) else ""

        if class_name in counts:
            counts[class_name] += 1

        detected_classes.append(class_name)

        if confidences_raw is not None and i < len(confidences_raw):
            detection_confidences.append(float(confidences_raw[i]))
        else:
            detection_confidences.append(0.0)

        if boxes_raw is not None and i < len(boxes_raw):
            x1, y1, x2, y2 = [float(value) for value in boxes_raw[i]]

            detection_coordinates.append({
                "class_name": class_name,
                "x_min": x1,
                "y_min": y1,
                "x_max": x2,
                "y_max": y2
            })

    crack_count = counts["Crack"]
    knot_with_crack_count = counts["Knot_with_Crack"]
    knot_missing_count = counts["Knot_Missing"]
    dead_knot_count = counts["Dead_Knot"]
    resin_count = counts["Resin"]
    marrow_count = counts["Marrow"]
    live_knot_count = counts["Live_Knot"]
    quartzity_count = counts["Quartzity"]

    critical_defect_count = (
        crack_count
        + knot_with_crack_count
        + knot_missing_count
    )

    moderate_defect_count = (
        dead_knot_count
        + marrow_count
        + resin_count
    )

    minor_defect_count = (
        live_knot_count
        + quartzity_count
    )

    total_defect_count = (
        critical_defect_count
        + moderate_defect_count
        + minor_defect_count
    )

    if crack_count >= 1:
        quality_decision = "REJECT"

    elif knot_with_crack_count >= 1:
        quality_decision = "REJECT"

    elif knot_missing_count >= 1:
        quality_decision = "REWORK"

    elif total_defect_count == 0:
        quality_decision = "GRADE_A"

    elif dead_knot_count >= 2:
        quality_decision = "GRADE_C"

    elif moderate_defect_count >= 3:
        quality_decision = "GRADE_C"

    elif minor_defect_count <= 2 and moderate_defect_count == 0:
        quality_decision = "GRADE_B"

    else:
        quality_decision = "MANUAL_REVIEW"

    qc_result = (
        "pass"
        if quality_decision in ["GRADE_A", "GRADE_B"]
        else "fail"
    )

    return {
        "quality_decision": quality_decision,
        "qc_result": qc_result,

        "total_defect_count": int(total_defect_count),
        "critical_defect_count": int(critical_defect_count),
        "moderate_defect_count": int(moderate_defect_count),
        "minor_defect_count": int(minor_defect_count),

        "crack_count": int(crack_count),
        "knot_with_crack_count": int(knot_with_crack_count),
        "knot_missing_count": int(knot_missing_count),
        "dead_knot_count": int(dead_knot_count),
        "resin_count": int(resin_count),
        "marrow_count": int(marrow_count),
        "live_knot_count": int(live_knot_count),
        "quartzity_count": int(quartzity_count),

        "per_class_counts": counts,
        "detected_classes": detected_classes,
        "detection_confidences": detection_confidences,
        "detection_coordinates": detection_coordinates
    }
How the Grader Works?
The Python block groups defects into three severity levels.
| Severity group | Classes |
|---|---|
| Critical defects | Crack , Knot_with_Crack , Knot_Missing |
| Moderate defects | Dead_Knot , Marrow , Resin |
| Minor defects | Live_Knot , Quartzity |
The quality decision is assigned using simple rules:
| Condition | Result |
|---|---|
At least one Crack is detected |
|
REJECT |
|
At least one Knot_with_Crack is detected |
|
REJECT |
|
At least one Knot_Missing is detected |
|
REWORK |
|
| No defects are detected | GRADE_A |
Two or more Dead_Knot defects are detected |
|
GRADE_C |
|
| Three or more moderate defects are detected | GRADE_C |
| Up to two minor defects and no moderate defects are detected | GRADE_B |
| Any other case | MANUAL_REVIEW |
For example:
Detected:
1 Crack
1 Resin

Workflow result:
REJECT
Another example:
Detected:
1 Live_Knot
1 Quartzity

Workflow result:
GRADE_B
Add Visualizations
After the custom grader, add a Bounding Box Visualization block and a Label Visualization block.
Add a Quality Summary Display
Now add a Text Display block to write the final inspection result on the image. Use this format:
QUALITY RESULT: {quality_decision}
TOTAL DEFECTS: {total_defect_count}
CRITICAL: {critical_defect_count}
MODERATE: {moderate_defect_count}
MINOR: {minor_defect_count}
Example output:
QUALITY RESULT: REJECT
TOTAL DEFECTS: 4
CRITICAL: 1
MODERATE: 2
MINOR: 1
This gives the inspector one clear image with both visual evidence and the final decision.
Add Workflow Outputs
The Workflow should return the annotated image and structured data. See the configuration below for this block.
Add an Optional Webhook
The Workflow I built for this example include a Webhook Sink to send the result to an external system. Example JSON payload:
{
  "quality_decision": "$steps.wood_defect_grader.quality_decision",
  "total_defects": "$steps.wood_defect_grader.total_defect_count",
  "critical_defects": "$steps.wood_defect_grader.critical_defect_count",
  "moderate_defects": "$steps.wood_defect_grader.moderate_defect_count",
  "minor_defects": "$steps.wood_defect_grader.minor_defect_count",
  "detected_classes": "$steps.wood_defect_grader.detected_classes"
}
The receiving system can then use the result for actions such as:
GRADE_A → Accept
GRADE_B → Accept as standard quality
GRADE_C → Downgrade
REWORK → Send for repair or trimming
REJECT → Remove from production
MANUAL_REVIEW → Send to inspector
Add Vision Events
Add a Roboflow Vision Events block to record inspection results. The event can store:
- Input image
- Annotated output image
- Filtered predictions
- Quality decision
- Pass/fail result
- Defect counts
- Metadata
The custom Python block returns qc_result
, which maps quality decisions like following:
| Quality decision | Event result |
|---|---|
GRADE_A |
|
pass |
|
GRADE_B |
|
pass |
|
GRADE_C |
|
fail |
|
REWORK |
|
fail |
|
REJECT |
|
fail |
|
MANUAL_REVIEW |
|
fail |
This helps track inspection history over time. For example, you can later review:
- How many boards were rejected?
- Which defect class appeared most often?
- How many images needed manual review?
- How often did cracks appear?
Add the Uncertain Prediction Branch
A production model should improve over time. To support this, add an uncertain prediction branch.
This branch should start from the raw RF-DETR predictions. Use detection filter block to Filter detections with confidence between 0.25
and 0.50
.These are predictions where the model is unsure. They are not used directly for the final quality decision. Instead, they are saved for review. Examples of uncertain cases include:
- Small cracks
- Partial knots
- Blurred images
- Poor lighting
- Unusual wood grain
- Defects near image edges
- Similar-looking defect classes
Following the configuration of Operations
parameter in JSON for detection filter block.
{
  "type": "roboflow_core/detections_filter@v1",
  "name": "uncertain_predictions_filter",
  "predictions": "$steps.detect_wood_defects.predictions",
  "operations": [
    {
      "type": "DetectionsFilter",
      "filter_operation": {
        "type": "StatementGroup",
        "operator": "and",
        "statements": [
          {
            "type": "BinaryStatement",
            "left_operand": {
              "type": "DynamicOperand",
              "operand_name": "_",
              "operations": [
                {
                  "type": "ExtractDetectionProperty",
                  "property_name": "confidence"
                }
              ]
            },
            "comparator": {
              "type": "(Number) >="
            },
            "right_operand": {
              "type": "StaticOperand",
              "value": 0.25
            },
            "negate": false
          },
          {
            "type": "BinaryStatement",
            "left_operand": {
              "type": "DynamicOperand",
              "operand_name": "_",
              "operations": [
                {
                  "type": "ExtractDetectionProperty",
                  "property_name": "confidence"
                }
              ]
            },
            "comparator": {
              "type": "(Number) <="
            },
            "right_operand": {
              "type": "StaticOperand",
              "value": 0.5
            },
            "negate": false
          }
        ]
      }
    }
  ],
  "operations_parameters": {}
}
After filtering uncertain predictions, use a Property Definition block to count them.
Then add a Continue If block with the condition uncertain_detection_count >= 1
. If there are no uncertain predictions, this branch stops. If at least one uncertain prediction exists, send the image to a Roboflow Dataset Upload block. Use tags such as:
uncertain-prediction
wood-surface-defect-review
This creates a feedback loop:
This helps improve the model with real-world examples after deployment.
The final result is not just a defect detector. It is a full surface inspection Workflow that detects defects, explains the decision visually, logs the inspection, and collects uncertain examples for future model improvement. See the following output how this workflow runs.
Surface Defects Conclusion #
Surface defects are visible problems on a material or product. These defects can affect the appearance, strength, safety, and overall quality of a product. In industries such as manufacturing, electronics, automotive, textiles, glass, metal, and wood processing, detecting surface defects early helps reduce waste, avoid faulty products, and improve customer satisfaction. Computer vision makes surface inspection faster, more consistent, and easier to scale. This helps teams make decisions such as whether a product should be accepted, reviewed, reworked, or rejected.
With Roboflow, building a surface defect detection system becomes more practical. It enables developers and quality teams to move from simple defect detection to a complete visual inspection application that can be improved over time. Start building yours for free today.
Cite this Post
Use the following entry to cite this post in your research:
Timothy M. (Jul 13, 2026). Automate Surface Defects Detection with Vision AI. Roboflow Blog: https://blog.roboflow.com/surface-defects/